Wednesday, 7 November 2012

Gooey chocolate comfort...


I was never really a  fan of brownies until recently.. I always found them too sweet or too chocolatey (is there such a thing as too chocolatey?!) A good friend of mine is addicted to brownies and was always asking for them when I'd visit. Since I'm such a good friend, I obliged, and after several batches of these amazingly rich and gooey treats, they're ready to be shared ...

For the brownie:
250g dark chocolate (70% cocoa solids) .. Always use the best ingredients you can afford, remember the expression about the silk purse and pigs ear?!
170g butter
200g caster sugar
3 large eggs
150g plain flour
2 tsp baking powder
2 tsp peppermint essence
2 bars of Frys Peppermint cream roughly chopped

Preheat oven to 170 degrees (fan oven) and grease and line square brownie pan.
Melt dark chocolate and butter together in a heat proof bowl set over simmering water. Once melted, remove from the heat and stir in the sugar.
Beat in the eggs, one at a time. Add peppermint essence.
Stir in sieved flour and baking powder. Finally mix in chopped mint chocolate.
Pour into prepared tin, and bake for 30-35 minutes. They should be a little squidgy, but that's fine because you want a fudgey gooey brownie :)
Turn off the oven. (I know that's obvious after baking, but I do have my reasons for being so particular!)

For the topping:
100g mint chocolate
100g mini marshmallows

Immediately after taking the brownies from the oven, cover the top in chopped mint chocolate (Frys Peppermint cream or After Eights). Sprinkle mini marshmallows on top.
Yes, the corner is missing... it 'fell' off...tragic accident! 

Place tray back in the oven (the oven is turned off, but still hot... we don't want to overcook the brownies, so the residual heat in the oven will be enough to melt the sweets, and give a gooey topping. You can use a blowtorch if you have one handy...

Browned and gooey after blow torch treatment...

Once the sweets are melted, remove from the oven and cut into squares... taste immediately (very important step!)

These brownies are gorgeous, they're rich and fudgy, and the sweet minty topping cuts through the rich chocolate perfectly.

They're just as delicious if you leave out the peppermint, and add in white chocolate chunks and raspberries or nuts... You can adapt the recipe to use whatever sweets you have in the house. I've added nuts, maltesers, oreos, orange zest... play with the recipe and find what works for you!

Be sure to let me know what you think!


Monday, 5 November 2012

Toffee apples in a cake???

As usual, I was in the mood to bake, but not really in the mood to go shopping. After a look around the kitchen, I came up with a giant bag of toffees, and lots of apples..... hmmmm toffee apple cake anyone? 

I find baking really relaxing so I can't resist after a bad day, a long day, a busy day... basically any excuse!! 

The blackberry and apple crumble cake I baked a couple of weeks ago went down very well, so I decided to make it again, with a twist. 

There are a few different steps to this cake, but it's really simple, and definitely worth it. 

Start by preheating the oven to 170 degrees (fan oven), and lining an 8 inch square tin. 

For the crumble topping:
2oz plain flour
1oz light brown sugar (brown sugar gives a more chewy caramel flavour than caster sugar)
2oz butter
50g finely chopped nuts (pecans or walnuts are perfect) 

Rub the butter into the flour until you have no lumps of butter. Stir in sugar and nuts, and set aside until needed. 


For the filling: 
4 large cooking apples
100g toffee sweets

Peel, core and slice the apples. 
Place in a pan over a low heat with the toffees, until sweets have melted and apples are soft, but still firm. The toffees should sweeten the apples enough, but this is a personal taste thing, so let the mixture cool slightly and taste. If you need to sweeten, add some sugar, and cook until dissolved. 
Set aside to cool slightly. 

For the cake:
5oz self raising flour
2oz golden brown sugar
1oz ground almonds
1tsp cinnamon
50g finely chopped toffees
1 egg 
50ml milk
4oz butter, melted

Start by mixing the dry ingredients. 
Melt the butter, before beating in the egg and milk. 
Add liquid mixture to the dry ingredients until just combined. 


To assemble the cake:
Pour the cake batter into lined tin. 


                                                           Top with the toffee apples.


Finally sprinkle the crumble topping over this.


Place in preheated oven, and bake for 25-30 minutes until golden and firm.


I prefer this cake warm, just out of the oven, but some of my friends think it's far better cold... I guess you'll just need to have a slice of each to find out what you prefer.... let me know!! 

I hope you enjoy this recipe... it's sweet, comforting and really delicious. 


Wednesday, 31 October 2012

Meh Halloween....

Ok so maybe it's not a choice between Halloween or Christmas, but in my case, I don't see the fascination with Halloween, so I give Christmas my all. I'm really glad I've never lost my child-like love of the festive season, hopefully I never will. I've always preferred winter to summer, perhaps that's down to Christmas falling in the centre of winter? Either way, I'll be thrilled when Halloween is out of the way and I can start planning for Christmas. 

We'll come back to this...for now, we'll focus on Halloween. Maybe I'm boring, or getting old or something, I just don't like Halloween... It gives kids with nothing better to do an excuse to go out and start fires and those old enough to know better, the excuse to wear next to nothing around town even though it's freezing! I don't resent the enjoyment that children take from the day, the dressing up, playing games and eating their body weight in chocolate......I just wish that fun could be left to the kids for the day, and then we move on... 

As we all know, nobody really needs an excuse to bake, so even in my 'Meh Halloween' phase, I managed to throw together some Halloween themed desserts.. I'll post the recipes soon, if anyone wants them sooner, feel free to leave a comment, or tweet @gingerbreadmiss and I'll get it to you sooner :) 

Spider Cheesecake.. Cointreau topping with bourbon biscuit base

Gingerbread Massacre - Red Velvet cake with marshmallow meringue icing


I promise that the run up to Christmas will be much more cheerful!!! 

For now... Happy Halloween! 


Sunday, 28 October 2012

Tis the season to be spooky....


I'm a real Christmas fan, but I felt it was only right to mark Halloween by baking some suitably spooky and traditional treats. Any excuse to bake right?

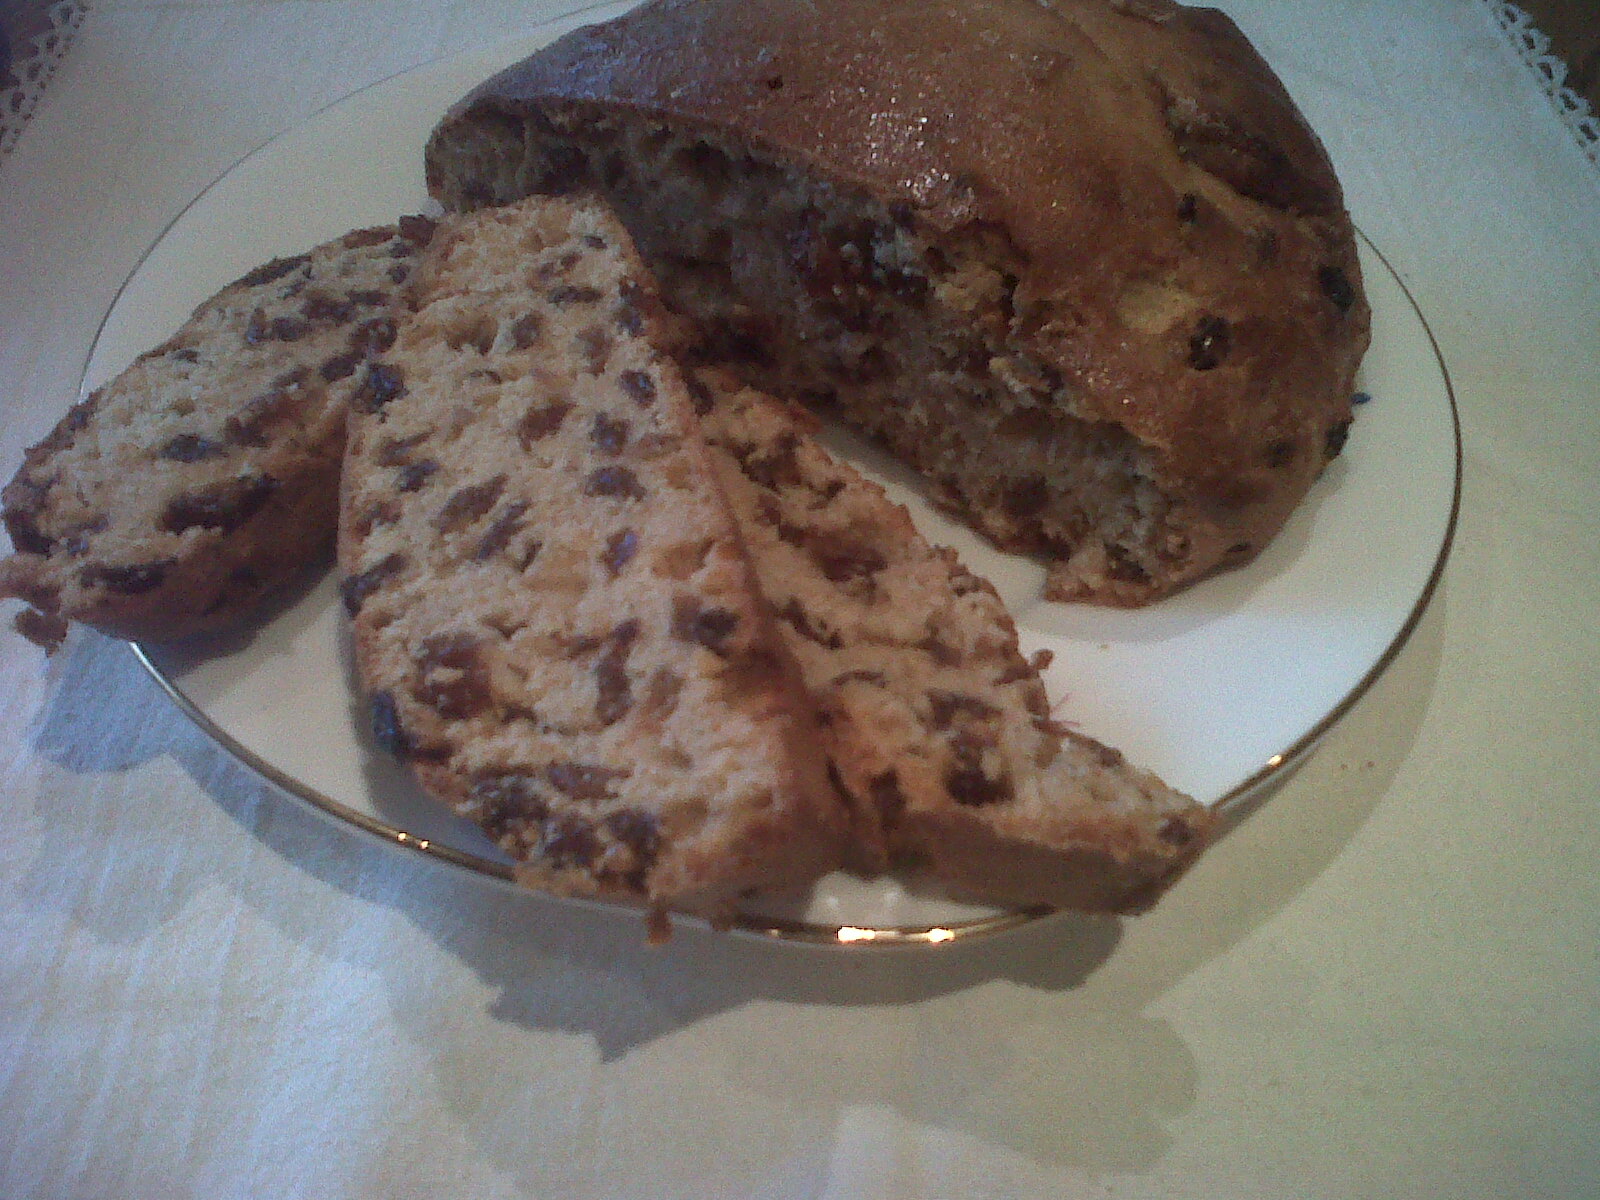
First off, I decided to give Barm Brack a go...we usually had tea brack in my house, so brack made with yeast was always a little bit special at Halloween..

I was feeling a bit lazy, so used the first recipe I came across on the RTE website, but as usual, added some personal touches to make it even better. Firstly, I didn't have fresh yeast, so followed the interweb's instruction that 1 ounce fresh yeast = 0.45 ounce active dry yeast = 0.33 ounce quick acting dried yeast I love a really flavourful brack, so I added 2 teaspoons of cinnamon, 1 teaspoon of nutmeg, and the zest of 1 large orange to the mixture.

Since I was using quick acting yeast, there was no need to add the yeast to the milk to prove, so this method is a little different to the one on the website above.

Start by sieving the flour, caster sugar and spices Rub in the butter, and add the dried yeast. Make a well in the centre and beat in milk, egg and zest. Once you have a dough, knead in the dried fruit and salt. Knead for 5 mins (I used the dough hook on my mixer cos I'm lazy!)

Cover the dough with lightly greased cling film (resting directly on top rather than across the bowl). Leave to rise for 30 minutes, before kneading again gently and shaping into a round.

Place on baking tray, and bake in preheated oven for 45 minutes.

Once you remove the baked brack from the oven, glaze the top immediately. For the glaze I used 2 tbsp of sugar dissolved in 3tbsp of orange juice and 1 tbsp of marmalade. Using a pastry brush, glaze the top of the brack, and leave to cool  (if you can resist the smell). I couldn't and as soon as I was sure I wasn't going to burn my fingers, had to cut a slice... warm brack with butter....YUM!


Friday, 26 October 2012

One to make anyone crumble...

A lot of people hate winter and everything that comes with it....Me on the other hand, never one to conform, LOVE LOVE LOVE it! Everything from the warm cosy clothes to Christmas to open fires, and most importantly the warming delicious comfort food that cheers us all up on a cold and dreary day.

I'm a huge fan of using simple ingredients to create delicious dishes that are quite simply YUM. Sometimes the oldies really are the goodies... 

I woke up this morning with rain beating on the windows at 7am (whoever said Velux skylight windows were a good idea was wrong... they're noisy and annoying when I should be dreaming of baking!). Such a dull day deserves a delicious teatime treat using seasonal ingredients.... what could be better than using apples from our orchard, and hand picked blackberries..I honestly can't think of anything right now... 

Apple and blackberry crumble cake it is! This is a really simple, warming cake that will cheer anyone up on a cold winter's day... 
    
To begin...                                   
1. Preheat the oven to 180d celsius.
2. Grease a loose base 8 inch flan dish. 

For the crumble:  
2 oz plain flour  
2oz butter
1.5oz caster sugar

1. Rub butter into flour until you have no lumps of butter left. 
2. Stir in caster sugar.

For the cake: 
5oz self-raising flour
2oz ground almonds
1 teaspoon cinnamon 
2oz caster sugar 
1 egg
50ml milk
100g butter, melted

1. Sieve dry ingredients together, and stir gently until just combined. 
2. Melt butter. Whisk in one beaten egg and the milk. 
3. Add liquid ingredients to the flour mix, and beat until well mixed. 

For the filling:   
2 large cooking apples                    
100g blackberries                                  
2 tbsp caster sugar                
1 tsp cinnamon    

1. Peel, core and slice apples. 
2. Toss slices in caster sugar and cinnamon. 
3. Wash blackberries, and pat dry with kitchen paper. 

Pecan topping:
50g chopped pecans
1tbsp runny honey

1. Chop pecans roughly. 
2. Toss in honey until coated. This will give them an amazing sweet, toasted flavour once the cake is baked. 

To assemble:
1. Spoon cake mixture into prepared tin. 
2. Arrange fruit on top of the cake mixture, pressing it down gently with a spoon. 
3. Next top with the crumble mixture. 
4. Spoon the honeyed pecans over the top. 
5. Place cake in the preheated oven, and bake for 35 minutes, until a cake tester comes out clean. 

Just before baking...

I can't decide if this cake is nicer warm, or cold... maybe try a slice of both and let me know what you think! 

Unfortunately someone cut the cake before I managed to get a photo.. I guess that's a sort of compliment to the chef!
Ultimate comfort cake...
        
My food photography skills need a crash course I think, but we'll get there eventually!

Speaking of skills, a big congratulations to the very talented Laoise on winning the Great Irish Bake Off challenge with her stunning Heaven & Hell cake.


Happy eating :) 

Sunday, 21 October 2012

Get your bake on for the Irish Bake Off final!!!

Two posts in one day since I baked like crazy this weekend..

The final of the Wholesome Ireland Bake Off is upon us, and anyone following on Twitter will know there's been lots of banter, scaremongering, psyching each other out and laughs over the couple of days. In keeping with tradition, the challenge for this week is based on the challenge faced by the contestants on the Great British Bake Off last Tuesday.

So bakers... ready, steady, bake the best chiffon cake you can!

As a total chiffon newbie, a lot of recipes were read before deciding on one suitable for the finale. As I mentioned in my last post, I love all things orange at the moment.... orange chiffon cake it is!!

Let the chiffon war commence!

Anyone tracking the challenge on Twitter will have read that I may have been over zealous in my baking, failed to realise that a combination of self raising flour, baking powder, cream of tartar and 8 egg whites may result in this....

Deflated, just like my confidence.....

Here's a tip.... read the recipe correctly, and use plain flour instead!

CHIFFON TAKE 2:
Attempt number 2 couldn't get worse right? Lesson learnt....read the recipe right this time....

I decided at the last minute to change the recipe. If this 'Hell' cake recipe was good enough for John Whaites, then it's good enough for me...

I really took my time with this, given how badly round one went!!


I started by separating the eggs, and whisking the egg whites in the electric mixer. Meanwhile, I mixed all the remaining ingredients in another bowl until just combined.

Once the egg whites are ready, it's time to fold them gently into the chocolate mixture. I would recommend doing this slowly, be patient when you fold them in, or you'll knock out all the air in the egg white and end up with a flat, heavy textured cake. Add the egg whites in 3 or 4 batches, this will make it easier to combine the two mixtures.

When you no longer have trails of egg white in the mixture, you are ready to pour into the lined 11" round cake tin. Tap the tin a couple of times on the counter top, this will knock out any big air bubbles, and prevent large holes in the cake.

Next step... and this is really important, you have to sit by the oven watching the cake for the next 1 1/4 hours or it couldn't possibly turn out right! Thankfully I followed this step, and the end result was a well risen, spongy textured chiffon cake that smells just like a Terry's chocolate orange bar.

Seriously relieved!!
Preparing the icings and decoration for the cake was a little slow....I promise it's worth the effort so stick with me...

Firstly, if you've read my previous post on Fondant Fancies, you'll see how I made the jelly for the filling in the Jaffa Cake inspired cakes. You'll need an 8" round disc of jaffa jelly for this cake. 

The next step is to melt 150g of white chocolate and spread on parchment. Make up a small batch of pink glace icing (2oz icing sugar, drop of pink colouring, rose water, and enough water to make icing thin enough to drizzle over the white chocolate). 

I used the leftover icing from the Fondant Fancies.... yes there is a pink, girly theme emerging to my weekend of baking!

Using a cake wire, slice the cake horizontally into three even layers. 


Now for the orange zesty buttercream... Start by beating 4oz of butter with the zest of one orange, and 2 heaped tbsp of marshmallow fluff. 

Once you have pale, fluffy consistency, beat in the sieved icing sugar. Continue to beat until the icing is smooth and creamy. 


To make the chocolate ganache topping, bring 200ml of cream almost to the boil with 1tbsp of finely grated orange zest. Add 200g of broken Terry's chocolate orange and stir until melted in the cream. Add 2tbsp of sieved icing sugar, and whisk until smooth and glossy. Set aside to cool. Once the white chocolate has set, break into rough shards. 

It's finally time to assemble the cake! 


Start by spreading a generous layer of the orange butter cream on the first two layers of the cake. 

Place the third layer on top. 


Using a palette knife, spread a thick coating of the chocolate ganache 
over the top and sides of the cake. 


Now, taking the disc of jelly, invert onto the top of the cake, taking care when peeling off the parchment. 


Do this slowly, or you will crack the jelly. 


Next, take the white chocolate shards, and press firmly into a mosaic style around the sides of the cake. 


The final step (FINALLY!), is to pipe chocolate ganache rosettes around the disc of jelly. 


And the finished product.....


Piece of cake....

So there you have it, after a weekend of baking, I'm delighted with the end result. I wanted to create a 
centre-piece cake, which paid tribute to the final challenges set in the Great British Bake Off. The bakers were given the challenge of creating a biographical showstopper.. I think I've answered this brief, by combining my childhood favourites; Fondant Fancies and Jaffa Cakes, with my current favourite of chocolate cake... 

The flavours in this cake compliment each other perfectly... a light orange chocolate sponge, orange buttercream, jaffa topping, chocolate ganache, white chocolate shards with rose flavoured icing swirls... and to top it all off, it's adorned with Fondant Fancies.. 

This cake is light and flavourful, and is definitely going to be baked again soon. 

Best of luck to all the other bakers! 


Fancy some bake off fever....

It seems like everyone was glued to the final of the Great British Bake Off this week... I watched it, joined by my housemates who munched happily on my Gateaux Honore inspired by Brendan's choux creation. 

I was a little surprised when I heard the bakers would be making Fondant Fancies. They're just a mini iced sponge, what's so complicated about that?!


What's so fancy about these fancies???
I have never been a fan of shop bought, pre-packed cakes, but these little treats were always the exception when I was a child. I'm not sure if it was the colourful icing, the taste, or simply the novelty of a bought cake in our house, but I adored them. 

These days, I'm a cake snob. I tend to look at most cakes and desserts, and think, 'I would do that differently/better'. My snobbishness hasn't extended to these colourful beauties. Occasionally, after a bad day, or in need of a little bit of comfort, I'll find myself lusting after a Fondant Fancy. I'm not sure why I've never thought to make them at home... but this weekend was my chance...

Orange is my flavouring of choice at the moment, so I went with an orange Victoria Sponge mixture for the cake. 

Ingredients: 
6oz caster sugar
6oz butter
zest of 1 large orange
3 large eggs
6oz self raising flour
1tsp baking powder
2tbsp orange juice

I always prefer to make this sponge in stages, rather than using the all-in-one method as it makes a lighter cake. I started by beating the caster sugar, butter and zest until light and creamy. Add in one egg at a time, beating after each addition. It's always helpful to add a spoonful of flour if the mixture starts to curdle. Fold in sieved flour and baking powder until just combined. Stir in 1 or 2 tbsp of orange juice to make the mixture less dense. I baked this cake in a 9" square tin, for 30 minutes (until golden and firm) at 160 degrees in a fan oven. 


Most of the recipes I looked at, had a layer of marzipan... I'm not really a fan, so decided to stick with my orange theme and make jaffa cake inspired cakes... I melted a pack of orange jelly and 2tbsp of marmalade with no peel in 125ml of boiling water. I poured half the jelly into a lined 9" square tin, and popped in the fridge for 30 minutes to set. 

I poured the remainder of the jelly into a lined 8" round tin (all will be revealed later!) 

While the jelly was setting, I made a start on my orange buttercream icing. 

Ingredients: 
10oz icing sugar
4oz butter
zest of 1 orange

For a really light, creamy buttercream I started by whisking the butter with the zest in an electric mixer until pale and smooth. Finally add in the sieved icing sugar, and leave to mix for 5 minutes. The texture of buttercream improves the more it's beaten, so it's good to be patient and leave it mixing for at least 5 minutes. 

Remove the jelly from the fridge, invert onto the cake, before carefully peeling away the parchment. 

Divide the cake into 25 squares. 

Start by putting a thin layer of buttercream on each side of the squares. Be warned, this is time consuming, but a necessary step to even out the edges of the individual cakes, and prevent crumbs in the fondant icing.

Once this step is complete, pipe a generous rosette of the buttercream on the top of each square.  


Finally, make the icing to cover the cakes. Pink has always been my favourite..

Icing ingredients: 
10oz icing sugar
pink food colouring paste
rosewater 

I love the fresh flavour combination of orange and rose, so decided pink rose icing was perfect! Start by adding a tsp of rosewater, and a drop of food colouring to the icing sugar, before adding enough water to create icing with a think coating consistency. 

This is where the challenge begins... dip them? coat them using a palette knife? pour the icing over the top? Now I realised why the contestants found  these cakes challenging... 

DO NOT dip them, the icing rosette will slide off.. 

The best solution I found, was to pour the icing generously over each cake, then use a knife to coat and smooth the icing around the sides. This is MESSY... put some parchment paper under your wire rack to catch the run off... 

Finish by drizzling melted chocolate over the top, and resting each square in a cupcake case. 


Yummy!


My entry for the Irish Bake Off Challenge is coming soon! Exciting!!!!!